Creating ClickPick Questions in SurveyWriter
SurveyWriter's ClickPick feature enables you to create questions for which the respondent clicks on answer options directly instead of clicking a checkbox or radio button. The ClickPick feature is handy when you need to show a lot of images or answer options on the screen at one time. This feature saves screen space and allows you to position answer options, especially images, very precisely. When respondents click on a ClickPick answer option, a colored border indicates their selection.
SurveyWriter's ClickPick feature is available in the following question types:
When designing a ClickPick question, design it for a standard screen resolutions, for example, 1024×768. If you have too many objects on the screen or spaced them too far to the right, the respondent may not scroll over to see them and have no way to select them.
To create a ClickPick question, use the following steps:
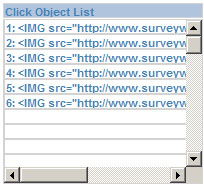
The ClickPick window consists of the following areas:
Labels that you enter in the single choice or multiple selection questions appear in this list. To set the parameters for individual objects, left click on a row. The settings for that object appear, and you can change them as needed. After you make the changes, click on the setting label to have it take effect. For example, to change the width, enter a new number for the width and click Width: to have it take effect.

Note: These are the settings for individual
click objects only. You will typically set
defaults for all objects using the Click to set defaults
button in the Click Object pane discussed below.
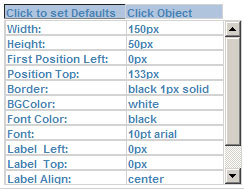
To set the parameters for all objects, change the value entered for a parameter under the heading Click Object. After you make the changes, click on the setting label, Width:, for example, to have the new setting take effect.

The settings available include:
| Click Object Settings | (Follows CSS standards) |
| Width: | Width of your text or image object in pixels, e.g., 150px. If your object is an image, make sure that these settings correspond to actual image width. |
| Height: | Height of your text or image object in pixels, e.g., 50px. If your object is an image, make sure that these settings correspond to actual image height. |
| First Position Left: | Number of pixels away from the left-side of the page, e.g., 2px. The default parameter moves all images. |
| Position Top: | Number of pixels from the top of the page, e.g., 10px. |
| Border: | Border format including color, thickness, and line style, e.g., #bdb76b 2px solid. Set border to 0 for no border. |
| BG Color: | Background color of a text object, e.g., darkkhaki. If needed, click Survey Options > Fonts for the colors available. Hexadecimal color values are acceptable. #ffffff is similar to entering white. |
| Font Color: | Font color of a text object, e.g., black. |
| Font: | Font style selected for text object, e.g., 10pt arial. If needed, click Survey Options > Fonts for the styles available. |
| Label Left: | Labels are positioned for the object based on their width, height, and alignment. Label left moves the label away from the starting point to the right based on the number of pixels entered here. Use negative numbers to move left. |
| Label Top: | Labels are aligned middle initially. Label top moves the label up from its starting point based on the number of pixels entered here. Use negative numbers to move down. |
| Label Align: | Sets label alignment: left, right, center. |
| DD objects per row: | Number of drop objects in each row of the drag and drop question. For example, if you have 10 objects, and set your DD objects per row to 5, SurveyWriter places 2 rows of 5 objects. |
| Click Border: | Border format after respondent clicks option including color, thickness, and line style, e.g., #bdb76b 2px solid. |
| Opacity: | Changes the opacity of an image after the respondent clicks it. Settings range from 0 to 100, with 100 indicating no effect on the image and 0 showing 100% through the image to the background color. |
Moving Objects in the Drag and Drop Interface
Initially all objects are aligned from left to right. Click and drag these items to position them as desired. You can also set the drop and target objects in orderly rows using the DD objects per row parameter.